


It’s no secret that legal professionals, especially law students, spend countless hours in Word drafting documents. So, here are some tips and tricks we’ve learned along the way that can help your drafting become a little less dreadful.
- Shortcuts
Making use of shortcuts in Word can allow you to draft faster and more efficiently. For example, you can highlight a single word by double-clicking it or an entire paragraph by triple-clicking.
To format your text, rather than clicking a button in the toolbar, you can use these keyboard commands:
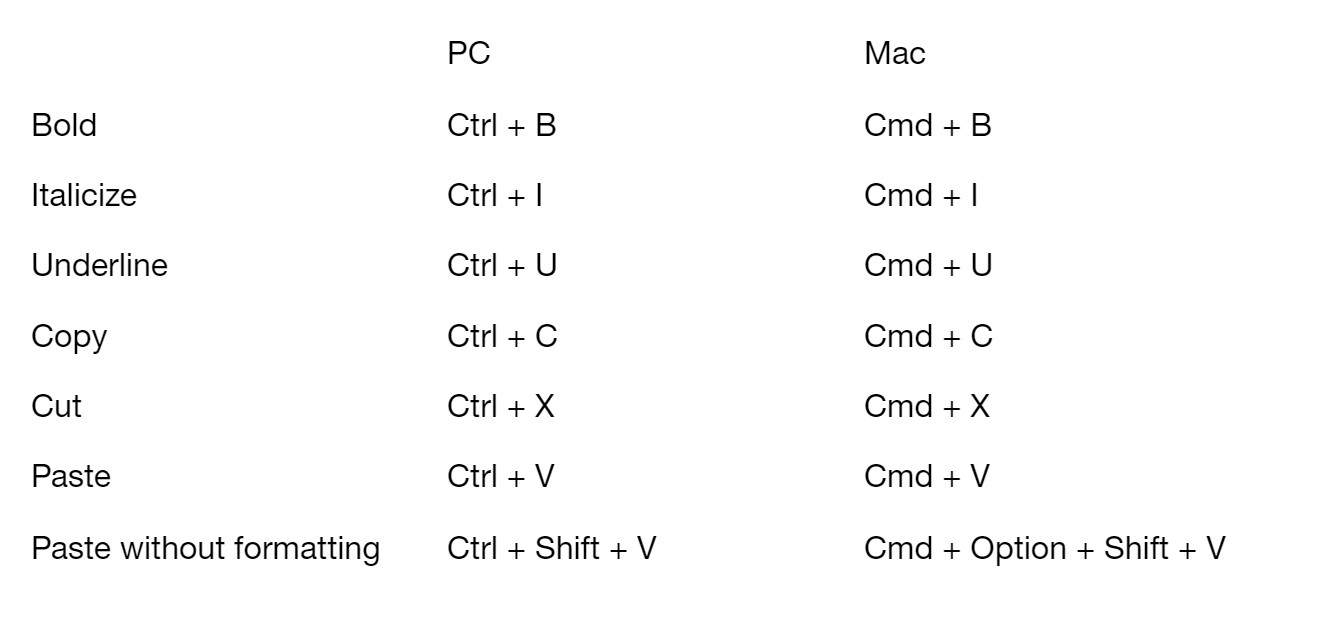
Beyond formatting, you can quickly save, undo a mistake, or redo an action with the following shortcuts:

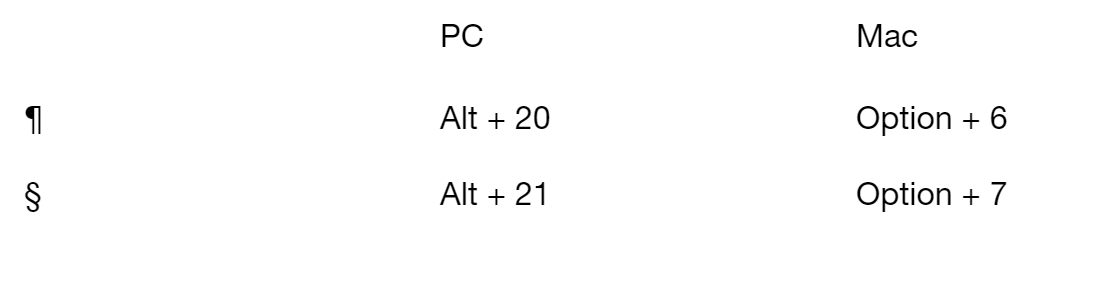
There are even shortcuts for common symbols such as § and ¶ (although these symbols may not work if you do not have a numeric keyboard).
- Styles
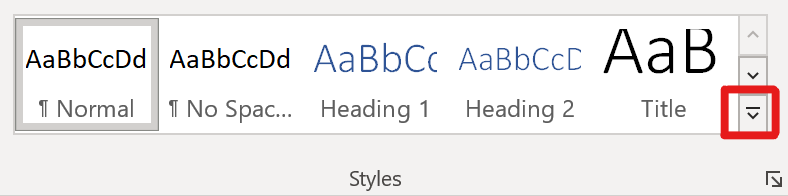
Utilizing the Styles pane in Word can allow you to format your documents the way you like them, faster. This pane can be found under the Home tab in the toolbar.
You can customize styles by clicking the furthest down arrow on the right side of the Styles pane and choosing “Create a Style.” Then you can name your style and modify characteristics such as formatting (text, size, alignment, etc.) and style type (tables, paragraphs, characters, lists, etc.). You can also modify a pre-existing style by right-clicking it and choosing “Modify” from the menu.
- Hyperlinking
Using hyperlinks is sometimes a necessary component of drafting documents, but not to worry - there is a shortcut for this too!
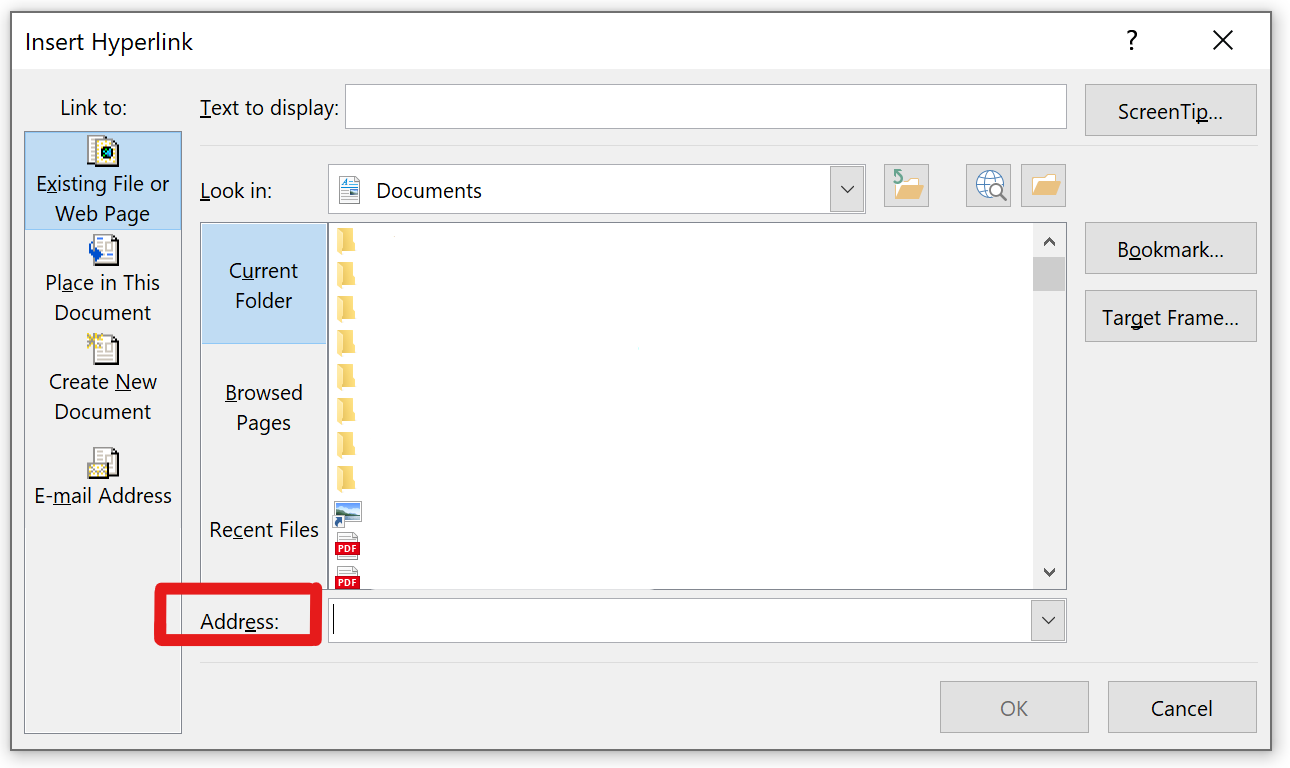
First, copy the desired link address and highlight the text you want to hyperlink. Then click Ctrl + K (or Cmd + K for Macs) and paste your link into the address bar. Another way you can do this is by highlighting the text you want to hyperlink, right-clicking it, and choosing “Link” in the menu that pops up.
- Numbered Lists
Managing multi-layered lists is not always easy to do in Word, as their default options might not be sufficient. To create a custom list format, click on the list icon and choose “Define New Multilevel List”. Once the menu pops up, you can adjust the format, alignment, and levels to your liking.

- Find and Replace Tool
Imagine spending hours writing a long document and realizing you used the wrong term throughout. This is where Find and Replace can definitely come in handy. You can either click “Replace” in the Home section of the toolbar, or use — you probably guessed it— another shortcut! Pressing Ctrl + H (or Shift + Cmd + H) opens up the same menu.
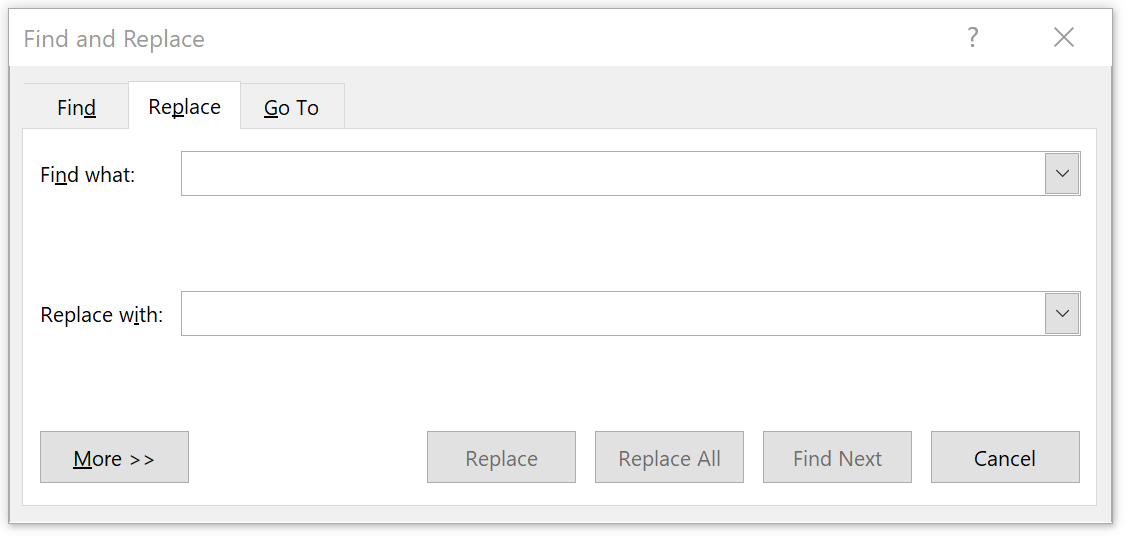
You can also look for words and phrases in your document by clicking Ctrl + F. Once you type a word or phrase into the search bar, Word will show you all instances where it was used.
If you found any of these tips helpful or have some more tips you want to share with us, feel free to reach out!